Saturday, 24 October 2009
Holiday cards
Saturday, 15 August 2009
Craft workshop cards
I've actually done this wrong, because I kept looking at the original card while it was closed. The opening should be on the left hand side, so imagine the card turned upside down and that would be the right way, and the blank space would be the back of the card.
This was created using a Dreamweaver brass stencil 'LJ849 Bare Trees' and black and white Dreamweaver embossing pastes. Bazzill lilac and purple card was punched using EK Success 'Dotted Wave'. Sentiment from Craftwork Cards and scalloped circles done with nesties run through the cuttlebug.
This stencil was again from Dreamweaver 'LL431 Sundae' and embossed with Dreamweaver paste. Colour was added with Colourbox Queue Fluid Chalk and stencil brush, except for the top part which was glued and glitter sprinkled over. Card candy then stuck on as the cherry, this and the sentiment are from Craftwork Cards. Dark brown ribbon. Paper was cut with Go Kreate 6x6 'Square Pointy #1' dies that are compatable with the cuttlebug. Pink bazzill card and Bo Bunny Double Dot 'Chocolate Dot' Pink and brown circles made with nesties.
The next two cards were made with teenagers in mind. Pink pearl card had been matted and layered with plain black card and Bo Bunny Double Dot 'Strawberry Dot'. The black card has Bo Bunny Double Dot 'Pink Punch' wrapped round, strawberry dot paper was punched using EK Success 'Swiss Cheese'. Black scalloped squares done with nesties as was the white straight edge squares. White squares had pink colour queue fluid chalk rubbed on, than stamped. Images are from Inkadinkado Inchies '98780 Special Thoughts' Small circles were done using smallest round nestie after being stamped.
This the one for a teenage boy. Blue co-ordination card was sanded around the edges as were the two circles (blue and light blue) Stars were cut using nesties and then put through the cuttlebug using the 'Tiny Bubbles' embossing folder. The card for the stars was also co-ordination, and again was sanded over. The image used is from Woodware 'FRCl058 Boy Zone' and was stamped on to a white circle that had been edged with a blue Colourbox QueueFluid Chalk pad. Derwent watercolour pencils were used to colour the image, and a metallic sakura pen for the wording.
A brayer was used to do the sand, Adirondaks Sunshine Yellow, sea Pool and sky ?, using the masking technique. Plain and scalloped oval were cut from nesties, the images are from Woodware 'GRCL212 Sunny Days'. The girl was coloured using Derwent Coloursoft Pencils. Stickles was used for her hair slide. Yellow Bazzill was used to mat and for the scalloped oval.
This is something a bit different from the norm. Image is again from Woodware 'GRCL212 Sunny Days'. Flags were stamped 8 times on to red, yellow and blue scrap card. then each cut individually, beach huts were stamped 4 times on the same colours and mounted on to white circles cut with nesties, each circle was edged in the same colour as whatever hut was on it. Then it was layered on slightly larger black circles again cut with nesties. Co ordinating ribbon was threaded through. The front of the card done in the same way, but with boats and wording instead. I'm falling asleep and I've only got two cards left to put on, but I'll finish off tomorrow and do a very quick blog hop as I know I have something to pick up from Susan.
Tuesday, 17 March 2009
A few makes
These black & white cards were originally designed by Shirley, one of the tutors at Craft Inspirations, Sutton Coldfield but I think they were mainly female ones, I had to make 2 male cards at short notice, and black and white were the only colours I could think of to make them look 'masculine' The numbers and tags were cut using my cricut 'base camp' and 'George'. Paper from S.E.I 'Black Orchid'. This is double sided paper, the other side is varnished black flowers, really nice and different. Thanks to Shirley, I never have to buy chipboard numbers, she told me to cut out several numbers and layer them on top of each other, the result is stiff numerals.
This one is also designed by Shirley, the only difference being I used prima flowers with silver stickles in the middle of them, instead of punched flowers. The image is from Woodware clear stamps JRCL308 'Flower Frames'
I used H20's on this Sarah Kay stamp 'Precious Moments' along with papers from Craftwork Cards 'Enchanted' range, card stock was from DCWV mat stack 'Brights' flowers from Prima.
Another Shirley design. She's really very good when it comes to designing, and I'm sure if she were to send her cards to some of the crafting mags, they'd snap her up as one of their designers. This was made in one of her workshops. Embossed border strips 'Floral Fantasy' from Craftwork Cards, the edges were done with colorbox fluid chalk. I think the tag was cut using the Cricut. The flowers were punched.
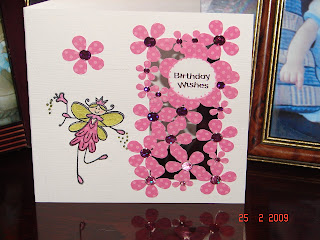
The above 2 cards were made in workshops with Shirley. The stamp is from Woodware (FRCL055) Flower Fairies, that's been coloured in using Sakura Stardust pens, Bazzill card stock matted with Colour Cordinations card that had been run through the cuttlebug and then lightly rubbed over with a sander. White flowers were then stamped using Inkadinkadoo inchies. The card with pink flowers was very different to make as we had to cover an aperture without using acetate, just different size punched flowers stuck to each other.
Sugar Nellies 'Daisy' painted using H20s scalloped circles cut from Nestabilities, flowers done with Woodware punch. Papers by Papermania 'Spring Burst'
Penny Black 'Delights' painted using H20s, as were some of the embossed flowers on the frame 'Julie's Daisy' from Craftwork Cards. Edging of frame was done with colourqueue fluid chalk.
Paper 'Enchanted' & embossed tile 'Spring Collection' from Craftwork Cards, tile painted using H20s and the border was done with colourqueue chalk.
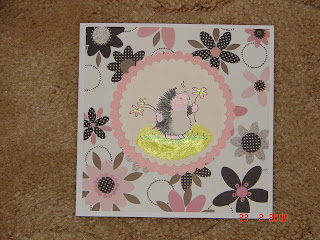
Penny Black stamp painted with H20s, nestie circles, 'Enchanted' paper from Craftwork Cards.
Again 'Daisy' painted with whispers/marvey pens, can't remember whose paper was used, sentiment from Craftwork Cards and Prima flower. I don't think I cleaned my brush properly after using a white Art Kure brush pen as there are some white blobs here and there, even after going over them they were still visible.
Penny Black 'Uplifting Occasion', using a mixture of Whisper/Marvey and Art Kure pens, Basic Grey paper 'Meltaway' from the Bittersweet range. Craftwork Cards sentiment edged with colourbox chalk pad.
Paper and embossed tile from Craftwork Cards, tile coloured in this time with chalk.
Sugar Nellie stamp 'Reflective', Basic Grey 'Bon Bon' and 'Soar' from the Lily Kate range, flowers from Prima. I can't remember what I used to paint the stamp with, as it's on pearlescent card and the efeect is the same, whether using H20s or pens. Sentiment as usual from Craftwork Cards.
Friday, 30 January 2009
Christmas and everyday cards part 2
The card with the 3 tiles was done by stamping onto chipboard, then coloured in with coloursoft pencils, it was then covered over with a versamark clear pad and dipped in to UTEE (ultra thick embossing powder) and melted using a heat gun. The coloured card was Bazzill stock and edged using a Fiskars border punch called Threading Water(Fiskars haven't got it in the UK for some reason, it's sold out most places I've looked). We all found out that if you colour on the wrong (matt)side of the chipboard the colours stay true, but on the shiny side they come out paler, which is the look we were aiming for. My flowers look orange, the lady who was sitting next to me her's looked a lovely pale peach. The greeting is from Craftwork Cards.
The pink card was done by triple embossing a small circular chipboard that had been coloured using a pink colourbox chalk queue, and again covering it with a clear versamark pad, dipping into UTEE, then heat embossed, this was done 3 times (that's why it's called triple embossing...lol) stamping an acrylic stamp (or woodbacked, the choice is yours) with black staz-on ink and stamping directly onto the melted embossing powder, you have to be quick to do the stamping part, the best way to do it is have your ink already on the stamp, and leave it resting on top of the pad to keep it moist ready for stamping on to the melted powder. Wait for at least 20 seconds before removing the stamp off the circle. The next pink circle was normal card stock that had been patted all over with a colour box chalk queue and edged with a deeper colour, then stamped using staz-on with the same design, the circular tile then covers the top part of the flower. The scalloped circle was done using a Cricut cartridge (sorry, I can't remember which one Shirley told us). Backing paper is on a 6x6 pad by Craftworks. Small black flowers punched, with sticky gems in the middle. Greeting is black peel offs.
The stamps were from Woodware 'clear magic stamps' JRCL308 Flower Frames.
The next two were made last week with Shirley. The owl and branch is on the Storybook Cricut cartridge using black and dark pink Bazzill card stock, and purple brads. Backing paper again is off the 6x6 pad by Craftwork Cards as is the greeting and frame. The frame was coloured using a pink colour box chalk queue and edged with black chalk queue, this will look like dark grey when it's done.
The next one as you can see is another frame card, backing paper and greeting as above. The frame was coloured in yellow by chalking (not chalk queue) over lightly till it was completely covered, then the flowers were gone over again in the same colour to make them darker, flowers were also punched out an stuck on randomly, stickles then added to the middle of the punched flowers. The frame was edged in a darker shade of yellow using a colourbox chalk queue. Woodware punch was used for the large flower, and a small circle punch for the middle. The flower was then put through a cuttle bug using the swiss dots folder and then lightly sanded over. The card stock for this is from the coredination range. This is instead of having a white core, it has a core colour that co-ordinates with the surface colour. It's so much better than having white all the time.
It was also used on one of the christmas cards in yesterday's post. The blue 3 wise men that's also cuttlebugged.
The 2 below are what I made when Lisa was the tutor at Craft Inspirations earlier this month. She showed us how to create a background using stamps. If you take a look at her blog The Craftbugs she will tell you so much better than me how to achieve these 2 cards!
Inkadinkado '97632 Sketchy Flourishes'
These are my versions of the ones made at the work shop. I used white core for the punched flowers.
The dufex ones are quickies that still have to have bits and bobs added, don't know why I thought they'd be quick, as I sat for ages cutting them out.
I couldn't find some christmas cards that I'd made last month, especially one that I hadn't finished.....I found them last night in the drawer with cards that I'd made at craft classes. I'm still putting them on here as they'll be a reminder that I haven't sent them to anyone!
The waterfall card, again was made at Craft Inspirations with Shirley as the tutor. I can't tell you how it was done as I can't remember the measurements. If I remember, I'll ask Shirley what they were. I do know that they're slightly bigger than the templates I've seen, they all seem to be very small and fiddly to put together.
The next two were made using Kanban toppers, papers are from my stash.
I used Art Kure brush paint pens to watercolour the snowmen, Penny Black 'Snow Family' and discovered that if used on pearlescent card that the colours also have that nice pearly look as well.
Penny Black 'Snowy' again watercoloured with Art Kure brush pens on pearlescent card. The one beside it was made using Kanban toppers.